
Installing OpenStack on Your Laptop Using Fusion
Transcript
hi welcome to another virtualized geek demo video we're going to be installing vmware's open stack Appliance within a VMware Fusion environment a special Thanks goes out to a Ken youu over at Cloud architect ming.com who did the write up for this process uh you can visit his website again Cloud architect ming.com so of of course we're working with a system with Vare Fusion already installed and as part of the process we're going to actually uh install VMware esxi running in a nested environment within our VMware
Fusion environment so the first part of the video we'll walk through installing esxi of course you'll need to have downloaded the VMware esxi 5.5 ISO and all uh requirements system requirements again uh this system is a system with 8 gig of RAM i7 processor and SSD drive so keep in mind your uh prep your uh you may not get as much mledge uh some special notes we are using internal networking for this uh lab so there's not much uh fancy nested networking as you've seen in
some of my other videos so we're selecting uh vmnet 2 which which is a hoston network and uh this will allow uh all of our VMS our esxi server our uh Venter uh Appliance all of that will be running within the same network as well as our um uh Nova installation our actual uh V uh Center and uh all of that will be running on the same network so you know some uh handy Gades when working with uh Mac I'm uh normally using VMware Workstation uh
special function keys really don't really work well in the Mac so you have to send the key using the menu option within uh the virtual machine menu of the VMware Fusion so as you see esxi pretty the install is pretty straightforward after you've uh pretty much selected all of the defaults we can uh pretty much fast forward to a successful install the prod product um can't say this enough make sure you document all your passwords uh I'm using either password one or VMware for all of
the passwords uh special note K also make note that you need to uh set static IP addresses which is pretty you know good practice in general with your esxi and another note uh which I learned very hard lesson learned with this uh demo is to always always uh make sure DNS is working well whether you uh use host files or you use actual DNS server uh we don't have a whole lot of uh room for this lab to run extra servers so I'm using host files
uh I actually walk you through this process of actually editing the if you're not familiar with Linux I walk you through the process process of using VI to edit the host file within uh with in uh your Venter Appliance uh as well as the um uh I don't believe you'll need I'm sorry you won't need a host file esxi at all but it's extremely important that you do that also you need to edit the host file on the Mac I spent quite some time troubleshooting uh
the ability to uh deploy the OVA for the Nova uh Appliance for the uh open stack Appliance uh because I did not add edit the host file on the Mac so it's important that you have uh proper DNS for all of your workstations as far as memory is concerned we're going with 4 gig of memory for our VM for our uh esxi install and for our Venter Appliance we're going to go ahead and run that on 4 gig of RAM as well you'll note by default
the Venter Appliance will want to select 8 gig of memory we want to make sure we run that on uh with 4 gig memory especially if you uh are running this as I am on a Mac with only 8 gig of RAM uh Fusion is not as generous with memory over subscription as uh vmw workstation is so again this is the process to uh edit the post file for on your VCA on your Venter uh server Appliance vcsa so when editing your host file we want
to make sure that we uh make entries for the obviously the Venter server uh for the esxi host and for the um virtual machine that's running on esxi that will actually host the V Center Appliance I'm using a 172.16.0.0 100 our uh Venter Appliance is at101 and our uh vova our openstack virtual Appliance will be at uh 102 now it's critical that we again document these host names and the IP addresses because we'll be using them throughout uh the in ation of the solution so uh
this is again one of those hard lessons that I've learned throughout doing these Labs at home that just because there're are Labs doesn't mean we shouldn't proper follow proper uh it standards or proper best practices in documenting our passwords our network uh configuration and the configuration of the actual uh virtual machines that we create in them environment uh we'll go ahead and start the next phase of the uh installation which is to uh go ahead and launch uh our Venter uh Appliance and uh finish the
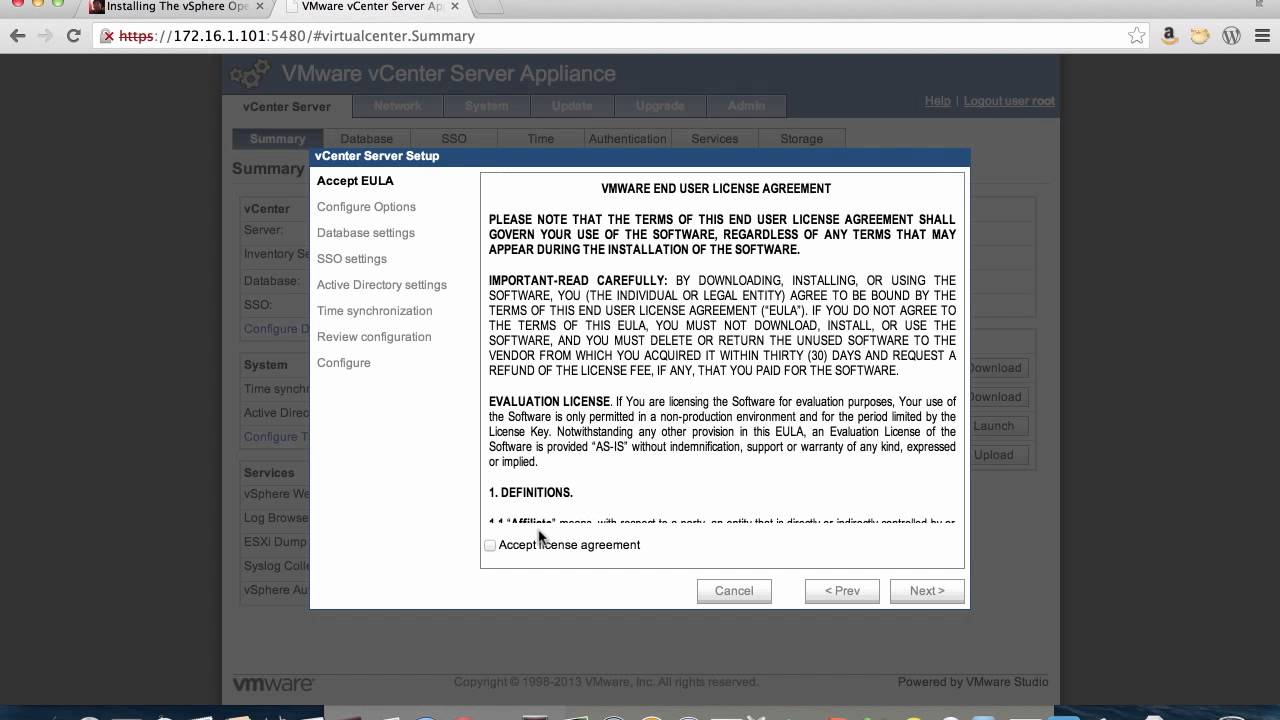
configuration of the Venter Appliance again root and VMware is our username and password we're going to go ahead and accept the license agreement and complete the configuration of the Venter Appliance uh we're going to set the uh we're going to do a set custom configuration for the Venter server setup uh this is again following the advice of Ken from his website uh we're going to choose the um integrated database we're also going to uh configure single sign on again uh for integrated single sign on we're
going to uh again Leverage The vcsa but it's important that we configure DNS because single sign on needs DNS acate directory we're not going to uh run run Windows in environment we can skip this uh Network time protocol we're going to leave uh blank again however it's critical to remember that we need to set up proper time uh I have my VM sinking to my Mac uh workstation so that uh correct time is configured uh and then we can just validate configuration and then go ahead
and log in to the actual uh Venter uh the uh vs sa based uh Venter client or better yet the web client for uh vpar uh this was pretty fun experience for me this is actually my first time uh really using the web client I've uh stayed away from it so far uh but this is again since we're have very limited resources for this lab I'm leveraging uh as much of the actual Max resources as possible by having uh using the web client instead of creating
that infrastructure to run the flat uh SE environment so this is this is this video is actually twofold we're talking you through both the installation of the open Stack video I'm sorry the open stack Appliance as well as configuring es esxi and V Center on a uh laptop so you know you can come back and reference this video to actually install uh Venter on a laptop or well as s6i we're creating a data center uh we're going to name our data center Data Center and then
we're going to create a club cluster and we're going to name our cluster openstack again documentation is critical you'll need to know both your uh default Data Center and your default cluster for uh the installation of the openstack appliance we're going to go ahead and turn DRS on and leave that on and everything else we're going to uh leave default for our data center and as well as for our cluster itself our openstack cluster so once we've installed both the cluster in the data center not
necessarily in that order of of course we're going to go ahead and add our host uh again make sure our uh DNS is working correctly we're going to go ahead and use the short DNS name uh we're going to set the password to uh uh V I'm sorry passport one Roo and passport one was what we selected earlier on we're going to set it uh select the light I'm sorry the encryption key and that's pretty much it for configuring Venter so you know we have a
typical Venter install with in which we're using a vcsa uh Venter server Appliance we have a a single esxi server uh with 4 gig of RAM and now we're going to go ahead and um uh do a little bit of house cing make sure that we have the open stack uh name to the cluster and then we're going to ahead and configure networking so for networking we're going to add a single uh additional uh V switch using the second I uh nit cart we installed uh
and we're going to assign it to a port group called br br1 100 BR 100 actually comes directly from the uh documentation for the open stack Appliance it's important to keep in mind that uh you really should reference the openstack uh Appliance uh documentation I found it incredibly useful uh in troubleshooting uh this install a couple of times uh I couldn't get the uh OVA deployed as well as I was having trouble with uh once I did get the OVA deployed I was having trouble um
uh deploying instances and the documentation uh is not very long but it's very helpful and it uh saved me probably a ton of uh time uh going back and referencing Ken's material actually even if I would have referenced k material I probably wouldn't have caught the mistakes that I did catch within that so once we have the networking fully deployed we're going to go ahead and deploy the OVA uh the OVA is about uh 3 gig uh and it takes a while to download uh it's
on the partner uh store for uh appliances uh so if you've ever downloaded a uh Appliance from the partner store you know how uh long or how slow that process can take so I uh really advise you doing that in advance or you'll spend maybe an hour hour and a half of wait time downloading that um that OVA uh so this is kind of one of the gates with the OVA deployment that I mentioned earlier uh I spent maybe about three hours troublesho why I couldn't
deploy this OVA I changed the uh default behavior of the cluster for uh virtual machine Hardware I did a ton of things to try I I rearranged the memory uh I tried to resort to the Legacy uh C pound client uh to try and deploy the OVA uh kept erroring out after 15 uh only after like a uh 15% uh progress when all in all it turned out to be a simple problem of DNS even though uh we're using a web client and the web client
is of course running on uh the Venter Appliance and most of the interaction you would think is coming from the Venter Appliance that's not the case I still needed to create a DNS entry for the pxi host uh within my workstation and that uh solves my problems with deploying the OVA as another point you need to install the integration tool for uh to be able to browse your local uh hard disk to upload the OVA to the V Center uh you don't have to really worry
about that too much you'll get prompted as we you just saw in the video to install it uh the prompts are pretty straightforward for installing the OVA we're going to uh use all our defaults the biggest thing is we're going to make sure we select the appropriate uh data store which you we only have one and we have to thin provision the storage because again we only have a 40 gig data store and uh this image by itself uh by by default I believe is 40
gig out of the box uh for the network configuration uh again we this is why we document our configs we want to make sure we have uh the correct data center the correct cluster and again uh the IP address to our uh Venter uh Appliance as well as the correct username and passwords it's critical that we F this uh uh session 2E out correctly with that information because there's no easy way to change this data feeds the um openstack Appliance and there's no easy way to
go back and change that within the interface of the appliance uh I've uh I I fat fingered I believe the password and since I fat fingered the password I had to go back destroy the VM and then redeploy the the openstack appliance to get uh full functionality or not even to even just get the uh opack interface to function correctly once we've deployed the openstack appliance we can go ahead and visit the website for The Appliance again we're using 1726 181102 and we can deploy a
instance uh it's important to re uh if we're not seeing this Nova availability Zone in the pull down in the availability Zone there's a chance that uh we're not working correctly uh if you're if uh you're getting either error or status unknown in the in any of these sections then again we haven't correctly uh install the appliance and more than likely it's the settings that we put in the custom settings tab uh when we deploy the OVA now we're deploying a default instance based off of
the default davan uh install and it took roughly about 10 minutes as you can see uh the Nova is using a uh the interface to the API to V Center to initiate the installation of the uh VM and to power it on so we'll see both the powered on VM uh in our V Center once that process completes it took again a while it took about 10 minutes so have some patience just as long as we see some status activ ity happening in both Venter and
within uh the open stack dashboard we should be all good well you know what that's it for this uh demo video it uh it was a pleasure again servicing you guys I look forward to comment feedback uh visit Ken's blog visit us on virtualized geekus uh.com as well and I look forward to uh the next video uh subscribe to our Tech talks on iTunes uh virtualized Geeks Tech talks Tech talk with no space thanks a lot and talk to you next video


